Easy How to Make Hair Scrunchies DIY Tutorial
Learn how to make hair scrunchies with scrap fabric to increase their scrunchie stash while decreasing your fabric stash. (Win-win!) Because scrunchies are back!
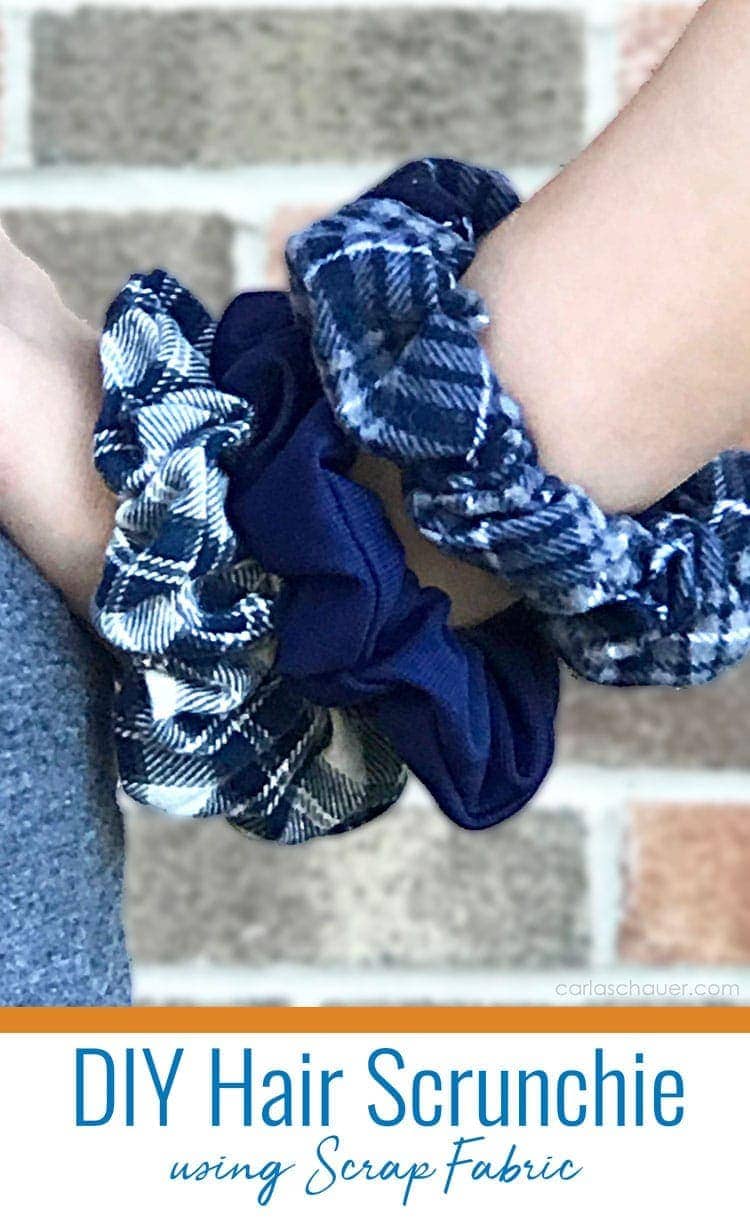
VSCO girls and other scrunchie-lovers can’t get enough of these fabric hair ties. This also makes a great inexpensive project to practice sewing skills.
Related Post: Make Pony-O Ribbon Bows
What’s the Best Fabric for Making DIY Scrunchies?
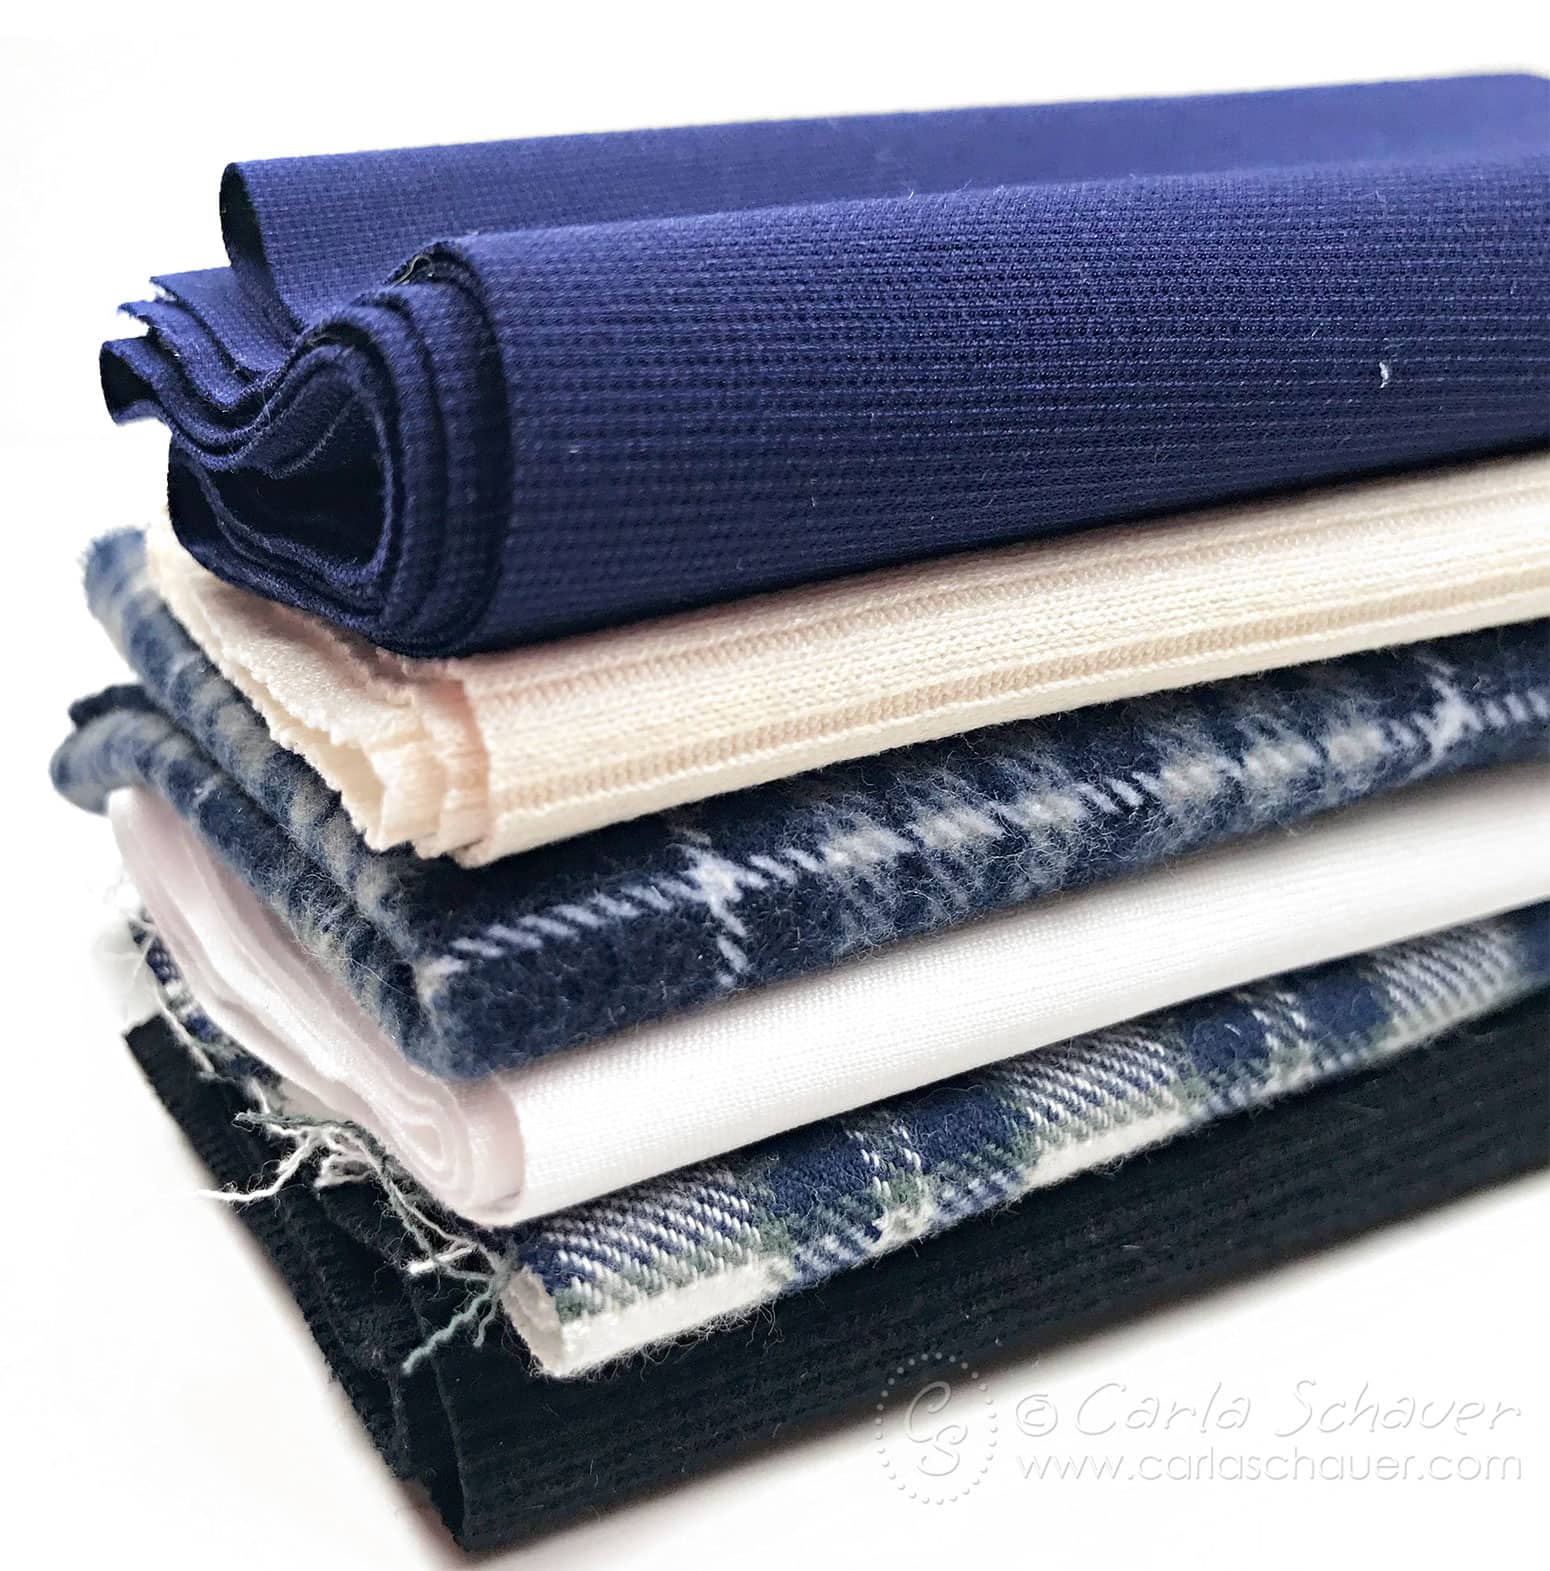
Really, you can use just about any fabric to sew scrunchies. Cotton fabric is readily available in lots of different colors and patterns and is easy to sew, so it’s a good place to start.
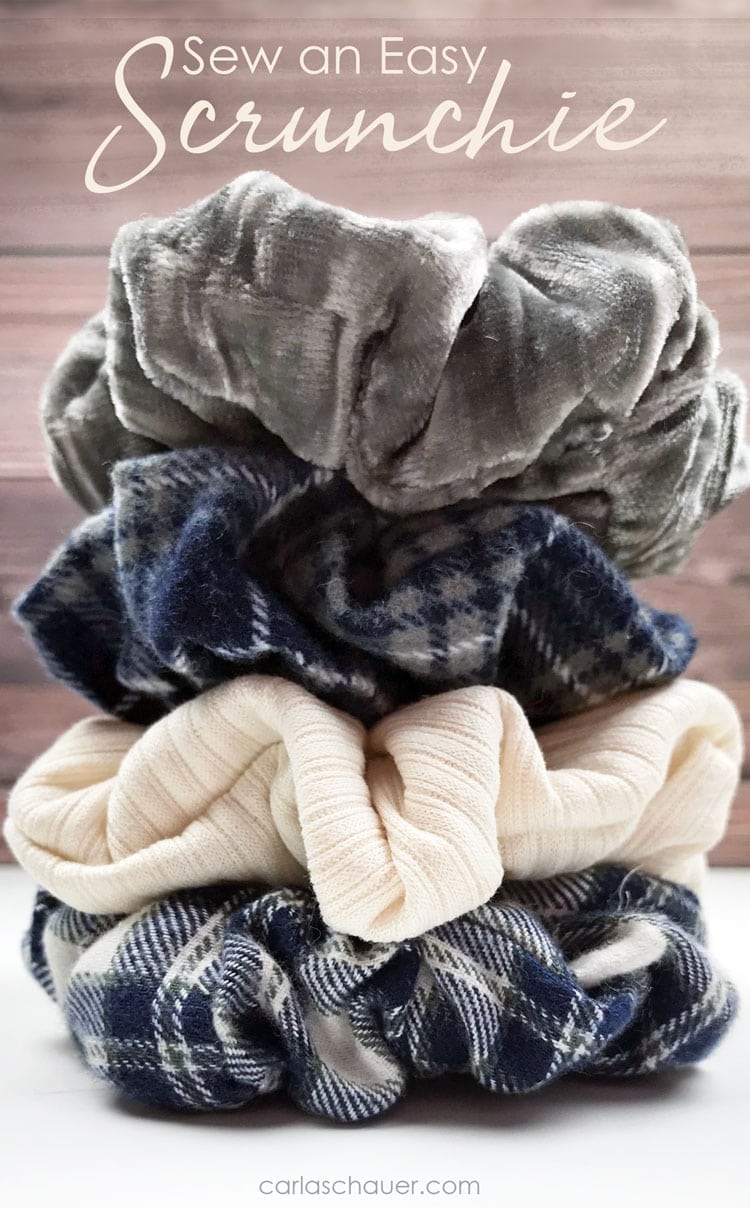
But other fabrics work well too. Try making satin, silk, flannel, polyester, or velvet scrunchies to suit your occasion or outfit.
Stretchy knits make great scrunchies, but are trickier to work with. You can even upcycle old t-shirts or other clothing.
How Much Fabric Does it Take to Make Homemade Scrunchies?
If you’re making multiple scrunchies from the same fabric, you make 2 scrunchies from 1/8 yard or up to 6 scrunchies from 1/4 yard if you use my standard sizing below.
This page may contain affiliate links. If you make a purchase through my link, I will earn a small commission at no extra cost to you.
How to Adjust Handmade Scrunchie Size:
I like a basic DIY scrunchie size made from a rectangle of fabric approximately 3.5″ x 21″. The dimensions don’t have to be exact, so you can use scraps that may be a bit longer or shorter in either direction without altering the final scrunchie significantly.
In general, adjust the scrunchie to your preference by changing width (more or less puffy) and length (amount of “scrunch” or ruffles).
- Make a bunchier scrunchie by using a longer fabric rectangle.
- Use a shorter fabric rectangle to make scrunchies smoother and less bunchy.
- A wider piece of fabric will make a scrunchie larger and fluffy.
- Using a narrower piece of fabric will make a thinner, less puffy scrunchie.
- Make a mini-scrunchie by reducing both the length and width of the fabric rectangle.
This makes sewing your scrunchie hair ties a great project for using up long thin fabric scraps.
Don’t have fabric scraps already? Fat quarters or fat eighths fabric bundles are a good option for coordinated designs in the right lengths.
Make DIY Scrunchie Hair Ties for:
- friend gifts
- stocking stuffers
- matching favorite outfits
- beginner sewing projects
- slumber party craft activities
Once you know how to sew a scrunchie, you may find yourself (or your scrunchie-wearer) becoming addicted to making more!
Now, let’s talk about how to make hair scrunchies step-by-step.
More DIY Scrunchie Tutorials
These classic scrunchies are an easy sewing project for beginners. If you don’t want to sew, or don’t have a machine, you can also make scrunchies without sewing.
Three of these 6 handmade scrunchie tutorials are no-sew options. Try one of these options for no-sew or embellished scrunchie hair ties.

Use the instructions below to sew a classic scrunchie hair tie. Save the instructions to your favorites using the button in the how-to card for later.
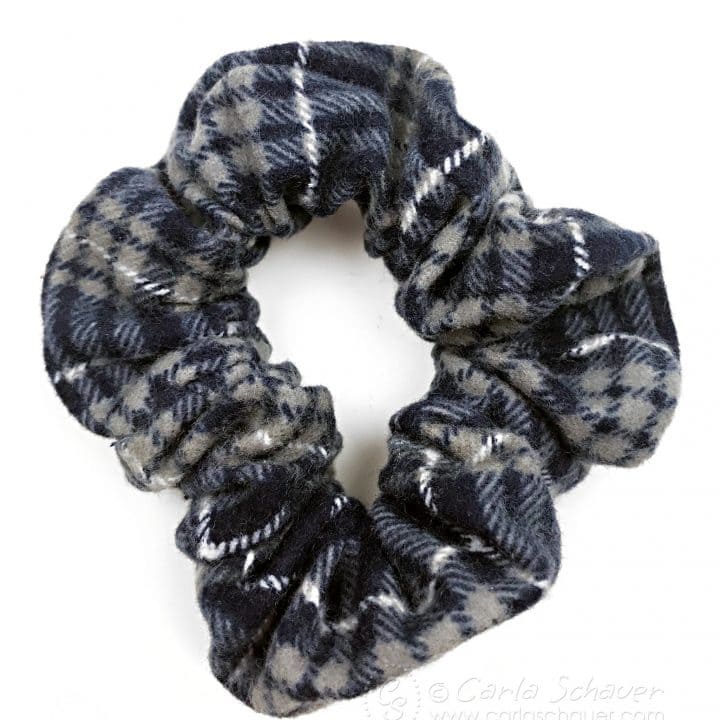
How to Make a Scrunchie
Sew hair scrunchies from scrap fabric. Great for teens! An easy beginner sewing project for all ages.
Materials
- Fabric rectangle
- 3/8" elastic (6.5" piece)
- Coordinating thread
- Safety pins (2)
- Needle
Tools
- [[Tube Turner (optional) ]]
- Sewing Machine
- [[Fabric Scissors ]]
Instructions
 Cut a strip of fabric approximately 3.5" x 21", making sure the corners are squared. Fold lengthwise with right sides of the fabric together, aligning long raw edges. Use a straight running stitch to sew along open side, with a 1/4" seam allowance, to make a tube.
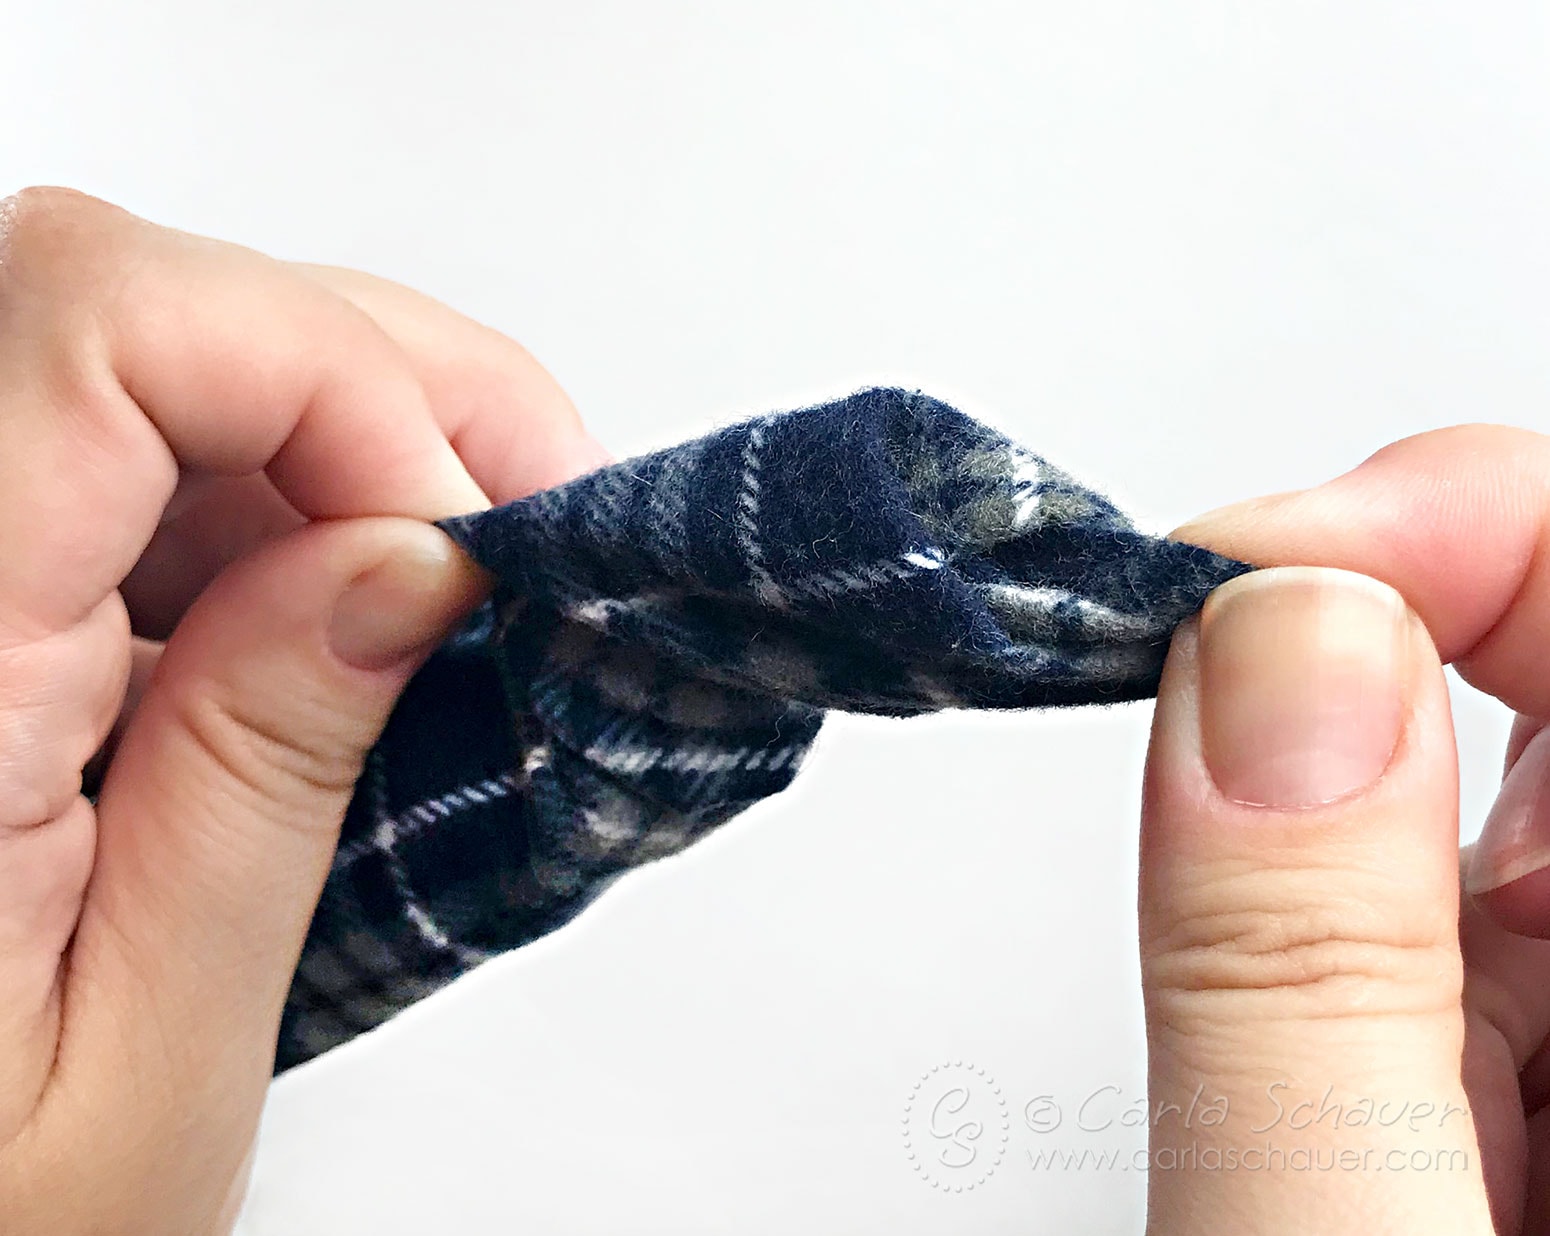
- Turn tube right-side-out (a tube turner will make this step simple).

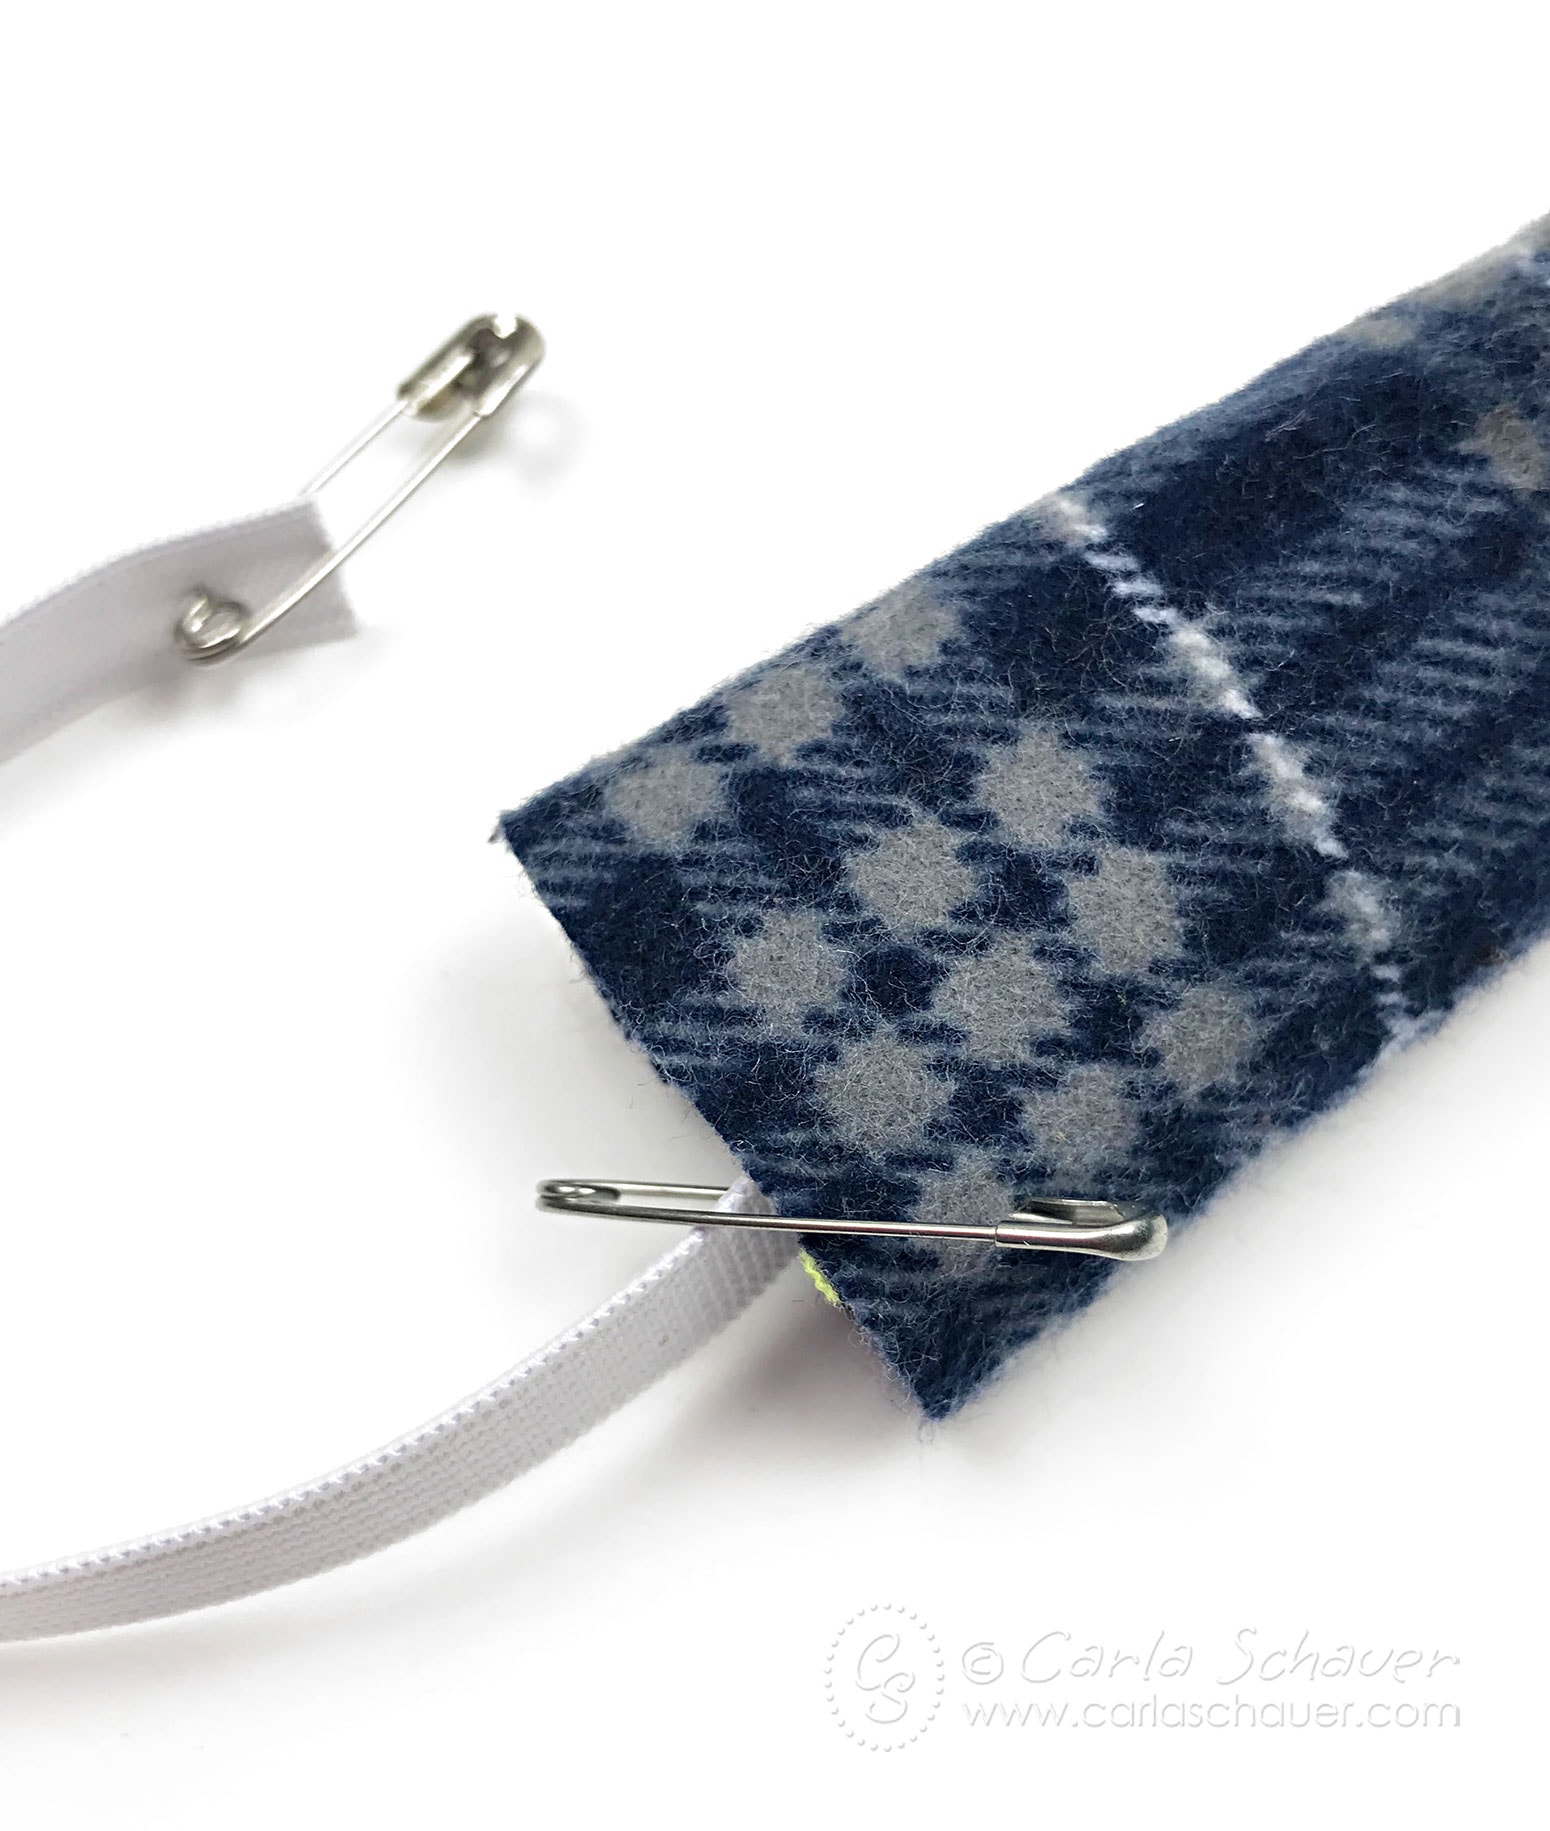
- Pin one end of elastic to the short end of fabric tube to keep in place. Attach a large safety pin to the other elastic end and use it to thread elastic through the fabric tube, bunching the fabric together as you go.

- Unpin elastic, holding ends together. Overlap ends 1/2" and stitch together using a zig-zag stitch.

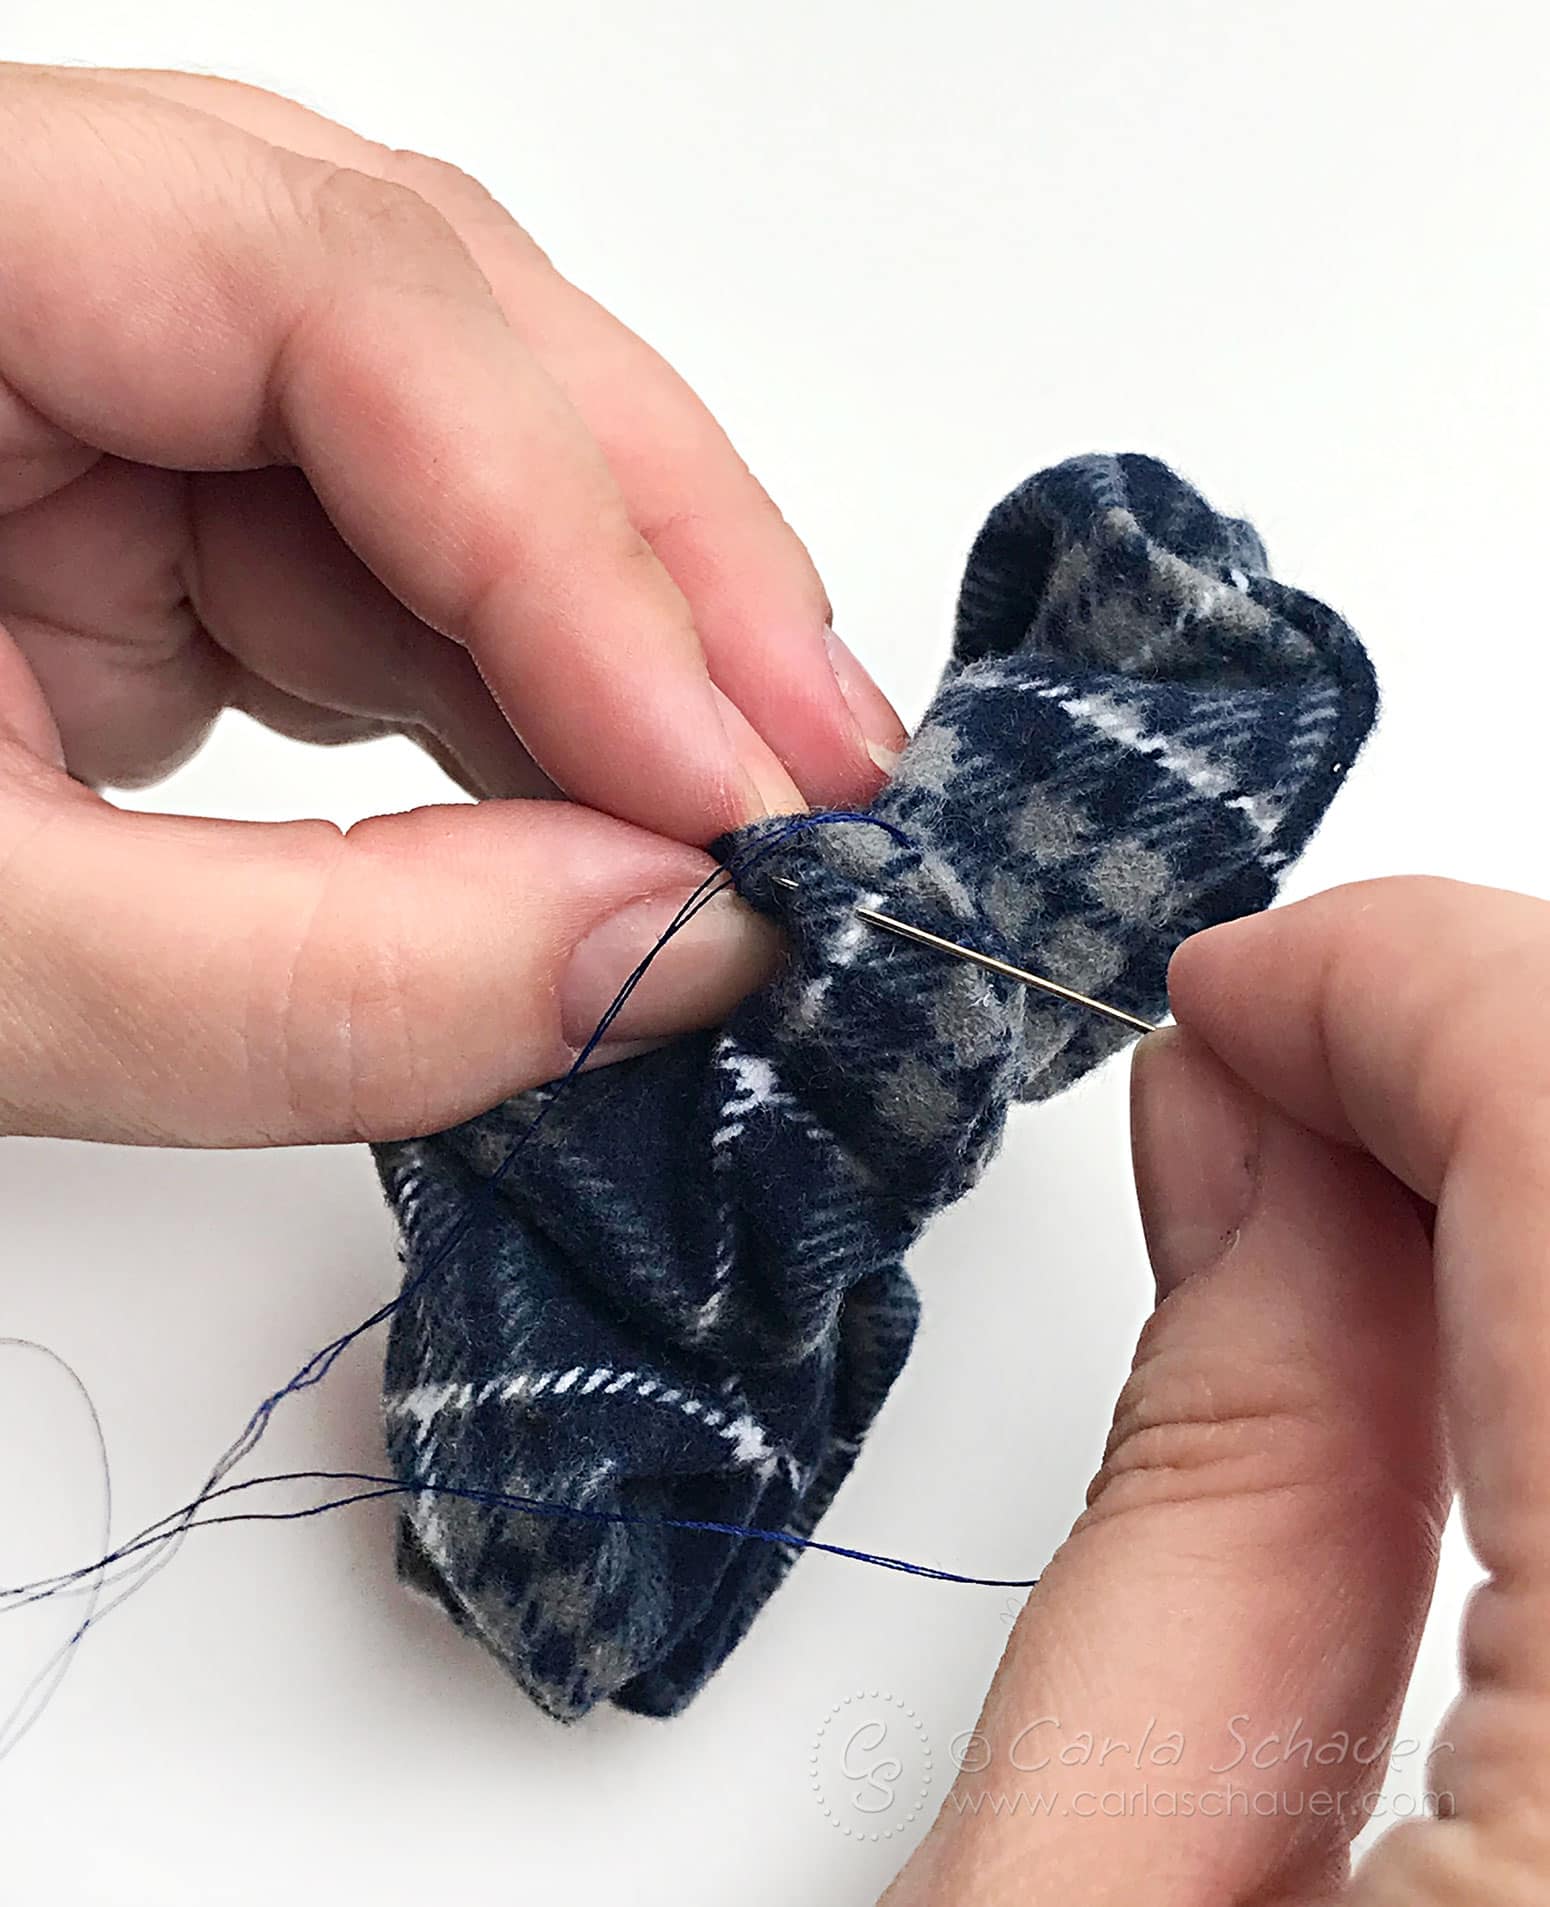
- Sew open ends of fabric together by hand, using a ladder stitch to close the tube and hide the seam.*

 Cut a strip of fabric approximately 3.5" x 21", making sure the corners are squared. Fold lengthwise with right sides of the fabric together, aligning long raw edges. Use a straight running stitch to sew along open side, with a 1/4" seam allowance, to make a tube.

Notes
*Instead of had sewing closed, you can fold one open end under 1/2", then tuck unfinished end into folded end. Sew by machine using a straight stitch 1/4" from end of fold. You will end up with a flat stitched spot in the tube. Some people are fine with hiding that spot in the "scrunch". I prefer hand sewing.
Recommended Products
As an Amazon Associate and member of other affiliate programs, I earn from qualifying purchases.


Share this DIY Hair Scrunchie Tutorial with Friends:
Your shares are how this site grows, and I am genuinely appreciative when you do. Pin to your favorite Christmas Pinterest board or share this idea to a craft group on Facebook.
